Cookie preferences

HundrED uses necessary cookies that are essential to use the service and to provide a better user experience. Read more about our cookies.
Accept cookies
search
clear

The recipe as an educational strategy to teach the use of the design methodology in art education.

Using structure to enhance design learning in education.

By using the structure and organization of a recipe, students can break down the design process into manageable steps that lead to project and problem solving. This innovative approach to education can be applied to all areas of knowledge and at different school levels. If you're looking for a way to enhance your students' problem-solving skills and make learning more engaging, you've found it.

Overview

Information on this page is provided by the innovator and has not been evaluated by HundrED.

Web presence

2022

Established

150

Children

1

Countries
Target group
Students lower
Updated
May 2023
I hope that my innovation can help students and teachers around the world to develop critical thinking and problem-solving skills through design that will lead them to become better citizens of the world so that they can contribute with great solutions to the current and future world problems and situations.

About the innovation

Why did you create this innovation?

I have always used design as a strategy to teach my students how to communicate through art. To me, design is a way of life, and it revolves around everything we do. It helps us develop a critical thinking mindset and to find our own way to solve projects and problems. This, are skills that children can develop and will lead them to be problem solvers in a world that is evolving rapidly.

What does your innovation look like in practice?

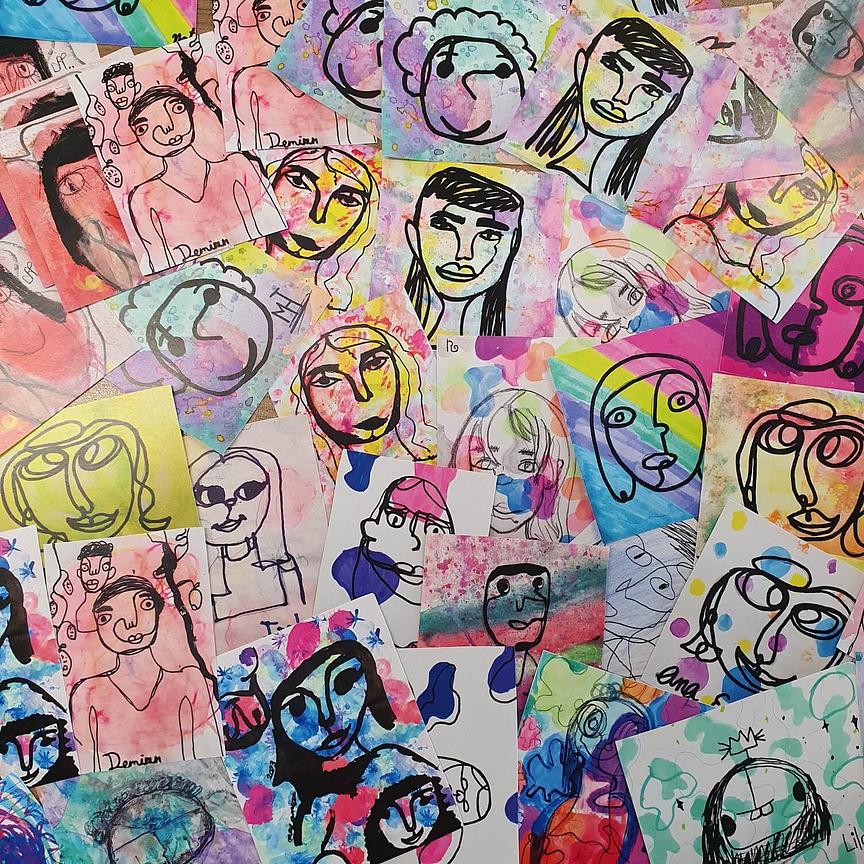
Understanding design concepts can be difficult for students, so I developed an analogical approach by linking design process terms to the steps of a recipe. For example, I compared elements of design to ingredients. This method proved successful as my students found it engaging and comprehensible. To build on this, I designed an activity called "The Blender," where students create a graphic project showcasing their favorite color, food, personality, and other unique traits.
The process involves:
1. Listing out the traits as ingredients
2. Sketching each ingredient
3. Combining the sketches in a blender to generate a final design
4. Adding color and applying the design across various mediums, similar to serving and trying a recipe.
I have utilized this approach for a decade, and I have empirical evidence to support its effectiveness.

How has it been spreading?

As an elementary art teacher, I had the benefit of teaching the same students for several years, which allowed me to both prove and improve this method. I observed how students who took my class for more than two years were able to internalize the method without prompting, and as an IB teacher, I encouraged them to use it in other classes.
After transitioning to a new job teaching 10th graders, I introduced them to this method and saw positive results. Moving forward, my goals for the next 2-3 years are to continue refining and developing new ways to help students use the design process to solve problems and complete projects.
Additionally, I created a YouTube channel called "Art with Miss Sara" where I will be uploading lessons based on this method for teachers and students worldwide.

If I want to try it, what should I do?

It is very easy to adopt this approach. Interested individuals can contact me through my Education Instagram account, @artwithmiss.sara, and I will be happy to provide guidance and assistance. Additionally, I plan on uploading a lesson on this technique to my YouTube channel during summer. I am also working on an article for a Mexican academic magazine on this topic, which will be available soon.

Implementation steps

1. Definition
In this step, you have to define what do you want to do and why.
2. Ingredients
Make a list of the ingredients or elements that are important to your project. For example, if you want to make a self-portrait, in a way, it should contain your main characteristics, like what do you want the world to see of yourself.
- if you wear glasses
- your favorite color
- hobbie
- favorite food
- special items you have
- pet
etc.
3. Preparation
In this step you have to think and research on how to graphically represent each item on your list and draw a simple sketch of it.
4. Blend
Imagine that you are going to put all the elements in your list into a blender. What would the result be? You will mix the sketches that you have previously made to create a new composition. You do not have to include all the sketches, only the ones that you like the most.
5. Serve
Do you like the result? In this step you can add color or something else that might contribute to it. You ca go back to the earlier steps if you need it.
6. Experiment
Now that you have your project ready, you can create in different mediums, for example with clay, pixels. etc.
7. Share
Share your creation with the world.

Spread of the innovation

loading map...